The Chair

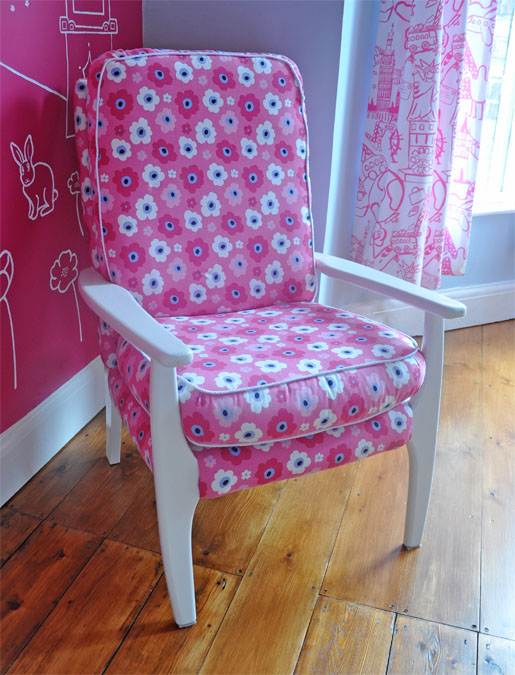
Dude, I totally upholstered a chair. It's probably the toughest DIY project I've ever attempted. But look how pretty she turned out:
Man, upholstery is hard work. It's exhausting, physical work - tugging out the old staples, ripping off the old fabric, driving in the new staples, hammering, banging, wrestling the chair into different positions, driving your needle through recalcitrant fabric - you really have to get involved. And while getting the fabric to look 95% right is tricky enough, tackling that extra 5% to get it looking perfect is seriously tough.
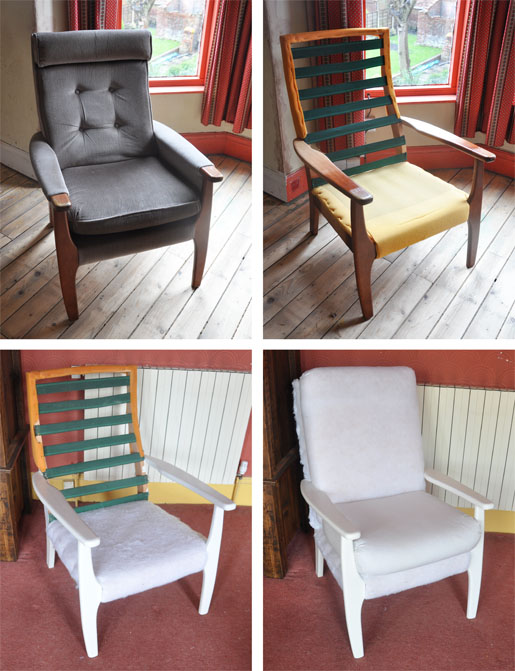
It all began when we moved in and found this incredibly ugly chair in one of the bedrooms upstairs. I'd always fancied having a crack at upholstery, so I watched all 13 of these excellent tutorials on YouTube, bought a few tools, and was ready to go.
The staples came out and the old fabric came off. I sanded, primed and painted the woodwork, and covered the base, back and cushion pads (which were in surprisingly good condition) in fabric batting.
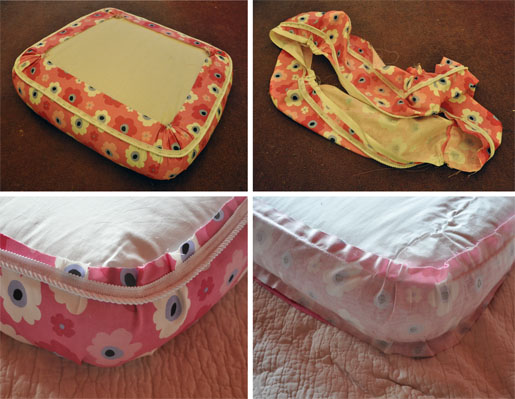
With the intended recipient of the chair being a felt-tip pen wielding, milk-spilling toddler, it was essential that the seat cushions had removeable, washable covers. I made them by pinning the fabric onto the seat pads to get a good fit (the alternative would have been to measure the seat pads and cut the fabric accordingly, but this felt a bit riskier as I didn't have unlimited amounts of fabric), pulling the corners tight, stitching on flanged cord, pinning and stitching on the top and bottom pieces, and finally sewing on sturdy press studs to close the flaps I had left at the back to get the cushion pad in and out.
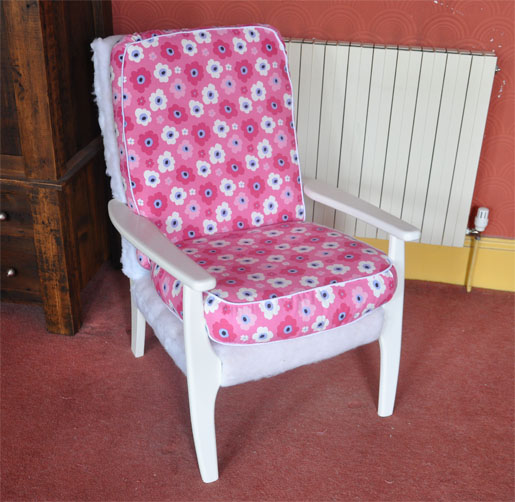
Nearly there now! Note by this stage I'd been working on the chair on and off for a couple of months. A speedy project this was not.
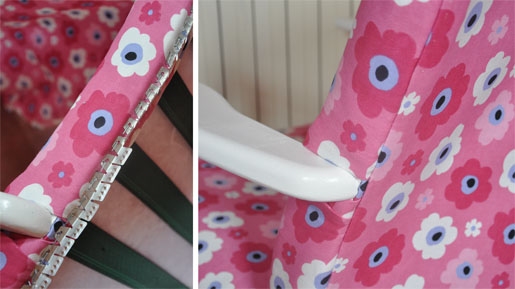
Introducing the secret weapon of the upholstery world - flexible metal tack-strip. This is the product that you need to get those invisible seams. It's both brutal (look at those spikes!) and genius. I had a heck of a job stapling through the metal to attach the strip to the chair, but once that was done it just worked like magic.
And that's how I took a chair from this hideous grimy biscuit-crumb stuffed monstrosity...
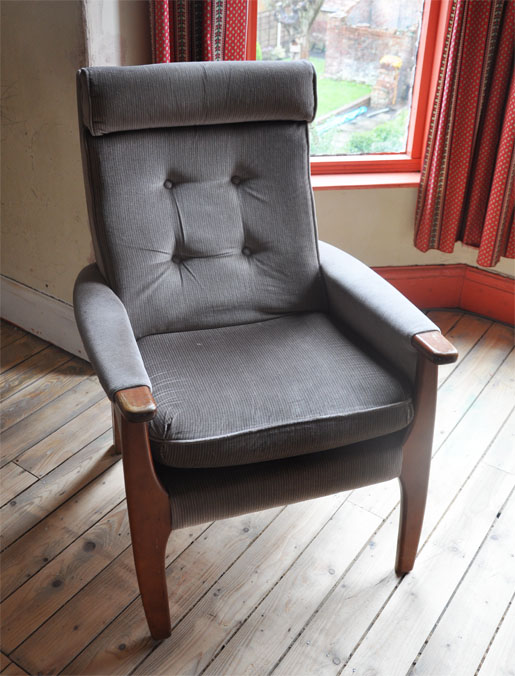
...to this pink vision of gorgeousness. Eva sits on it every night to read books (OK, OK, to watch cartoons on the iPad) and seems pleased with her Mama's efforts.
This was the last project I had on my list for her new big girl bedroom, so I'm finally ready to share all the after pictures - coming soon to a screen near you!