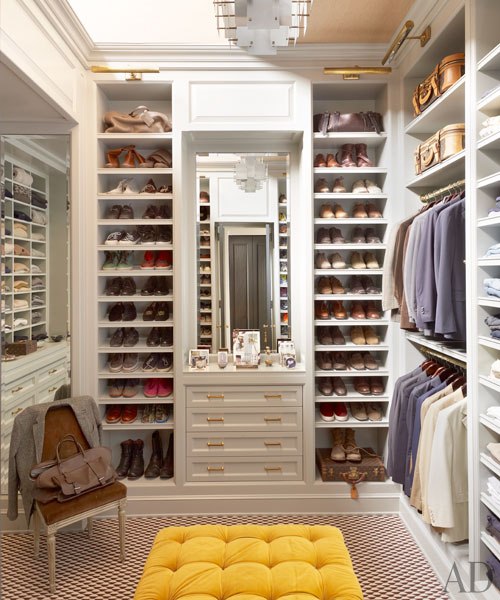
The Design For Our Fitted (Built-In) Wardrobe
This is what most designs and plans look like round here - scribbles on multiple sheets of paper interspersed with drawings by Eva. I'm aware there's probably a more high-tech way to tackle the matter but I'm an old-school girl and heart so I'm happy with a pen, paper and calculator.
This is the design for our fitted wardrobe (also known as a built-in wardrobe).
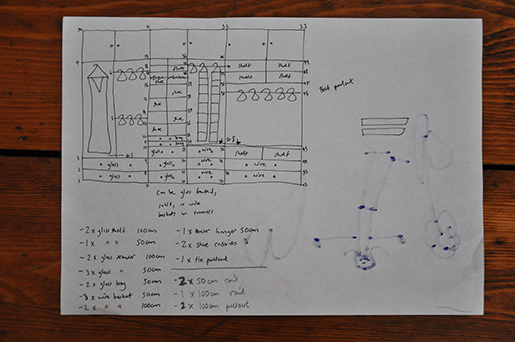
The wardrobe will go along the wall where the bed is currently - it will start at the bay window and run for 3 metres. This will leave 1.5 metres to squeeze in the ensuite. It will be as high as the picture rail - any higher and we'd need one of those library ladders to access the top cupboards.

When I drew the design I didn't do it to scale - I just sketched out what I thought we'd ideally need. I then messed around measuring things with our new DeWalt laser measure (and good grief I cannot believe we have managed to do so much renovation thus far without one of these beauties) and it turned out we would be able to fit in what I had originally drawn, albeit with a trouser hanger for the lower of my two rails as there isn't space to fit in two normal height ones (I measured my shirts and blazers to check).
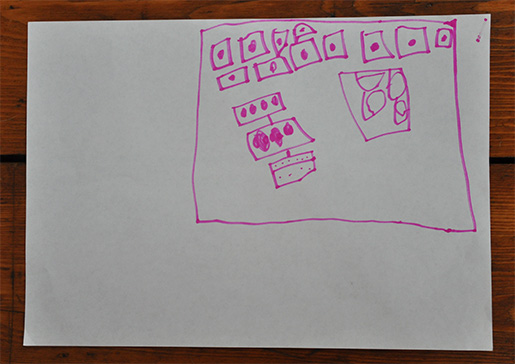
Eva saw me drawing, enquired as to what I was doing, trotted off to her bedroom and came back five minutes later with her own picture of a wardrobe. *So proud.*
The plan is to build a frame using 2x2" lengths of planed timber that will be attached securely to the wall, and then frame it out with 3mm birch ply or similar. We're going to use Ikea drawers (they have multiple options and all with very nice soft close runners) and I did look at the Pax wardrobe carcasses but they seemed a bit flimsy. I also don't want to use laminate because we want to paint the whole lot white and wood is easier to paint.
For the wardrobe doors, we're buying a number of carved wooden Indian screens on eBay that we will cut to size and fit onto the frame with an additional face frame so it all looks nice and tidy. I did a lot of reading about fitted wardrobe construction on various DIY sites and the combination of frame attached to wall, ply plus face frame seems to be the way to go.

Internal rails and fittings will be Hafele, and I'm mildly contemplating spray-painting them copper as chrome seems to be hopelessly passe now, although I don't know how durable the finish would be. We're also planning on using Ikea LED lighting strips that light up whenever you open a door because, well, when you're going to all this trouble to accomplish the hard way something admittedly simple like storing your clothes then you might as well go nuts.
We each get 1.5 metres of cupboard space. My side will have glass-fronted drawers, and Andre's going to have wire baskets. I've designed it so it will hopefully look balanced, with hanging rails on each side, and shoes and shelves in the middle. The top part will be cupboard space for things like suitcases and general Boxes of Important Stuff that we currently have attractively piled up in the corner of the bedroom.
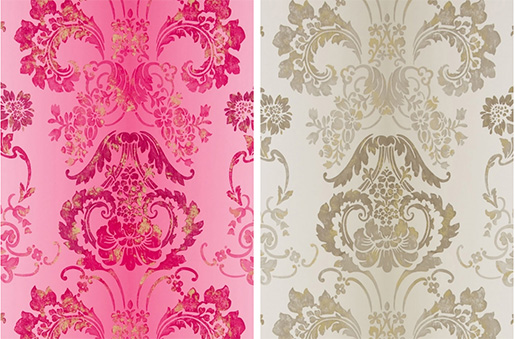
I want to paper the back of the wardrobe with a mad pink and gold wallpaper on my side and the same design on Andre's side in a gold and brown colourway, so I'm going to go and have a chat with a local interior designer, David Gavin, and take a look at some wallpaper samples. Something like Designer's Guild Kashgar (thank you Kimberly for pointing me in the right direction!) would be perfect.
You can read more about our requirements for the wardrobe here. I'm pretty sure we've covered everything, including the all important Currently Wearing Drawer. If you can think of anything we've missed, or have done this before and have any tips, please let me know! I'll be placing an order for approximately 100m of timber (yes, really) later this week.
Happy Sunday - hope you have a great week.